
Track Time with a Click: Simplifying Time and Expense Management in Acumatica 2025 R2
Manual time tracking is one of those daily tasks that feels simple—but eats up more time than you realize. Whether your team includes hourly workers, project-based employees, or staff logging hours for billing, accurate time tracking is essential. Fortunately, with Acumatica ERP 2025 R2, the process just got a whole lot easier.
Say Goodbye to Manual Time Tracking
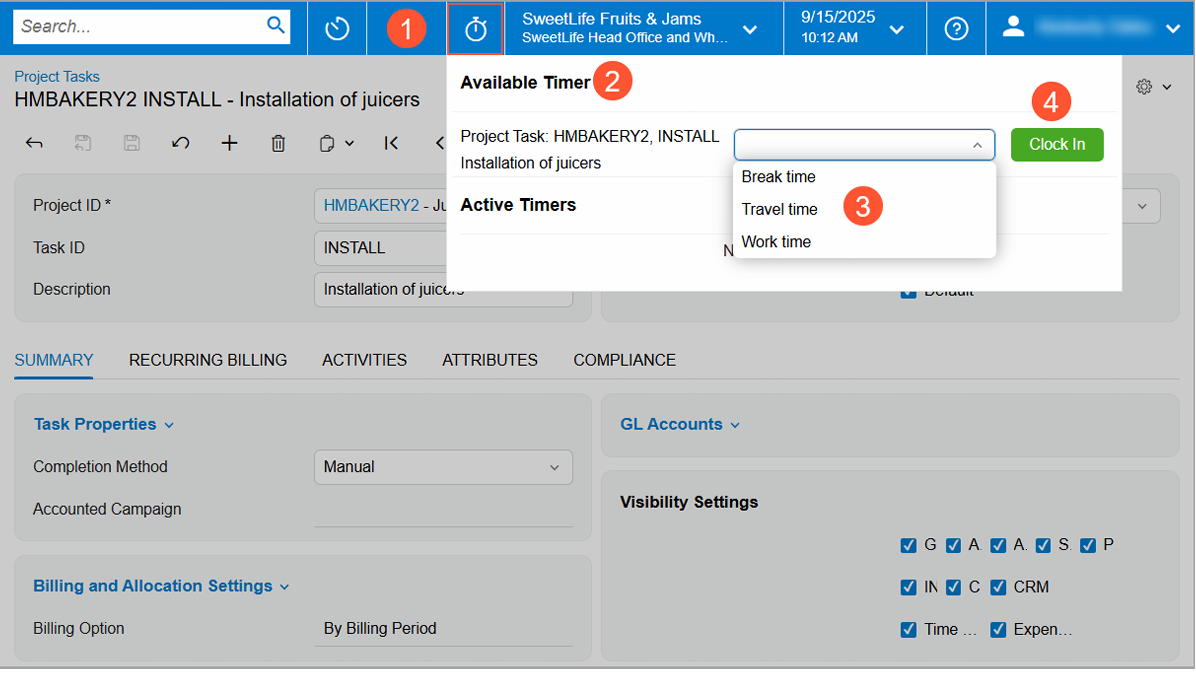
Acumatica’s latest release introduces streamlined time tracking that allows users to clock in and out directly from the Project Tasks (PM302000) form. Once configured, simply open your project task and click the new timer icon. Acumatica automatically begins tracking your time—and stops it when you clock out. Your working time is logged automatically, eliminating the need for manual entries or guesswork.
Available exclusively in the Modern UI!
To use the new time tracking functionality, make sure:
• The Clock In and Clock Out feature (in the Experimental group) is enabled in the Enable/Disable Features (CS100000) form.
• Your user account is linked to an employee record on the Users (SM201010) form.
Set Up Your Time Log Types
Before your team starts tracking, you’ll want to define your Time Log Types using the new Time Log Types (EP209000) form. Acumatica includes several predefined options:
• Break – for rest periods
• Travel – for time spent on the road
• Work – for standard working time
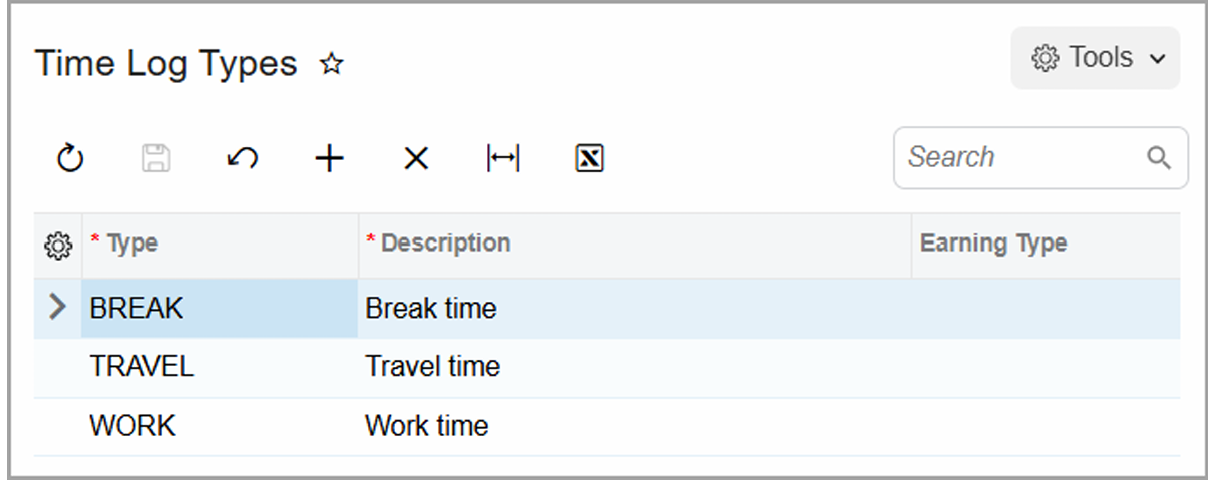
If you want logged time to be recorded as a project cost, specify an earning type. (For internal tracking only, you can leave this blank.)
You can also add your own custom time types by completing the following fields:
• Type – ID of the time type
• Description – brief explanation
• Earning Type – determines how labor costs are calculated
To make daily tracking even faster, select a default time type in the Time and Expenses Preferences (EP101000) form. “Work” is selected by default, but you can change this to whatever makes sense for your team.
Time Tracking in Action
Let’s walk through a typical day:
1. Clocking In
2. Open a project task and click the timer icon in the top pane. In the timer panel that appears:
3. Confirm the correct task is selected.
4. Choose your time type (Work, Travel, Break, etc.).
5. Click Clock In—and you’re officially on the clock!
You can even change the time type while the timer is running, and Acumatica automatically updates the log to match.
Checking Active Timers
Once you’ve clocked in, your timer moves to the Active Timers section, showing the project name and elapsed time at a glance. Need to focus on another window? Collapse the timer panel—your active timer will still display in the top bar for easy access.
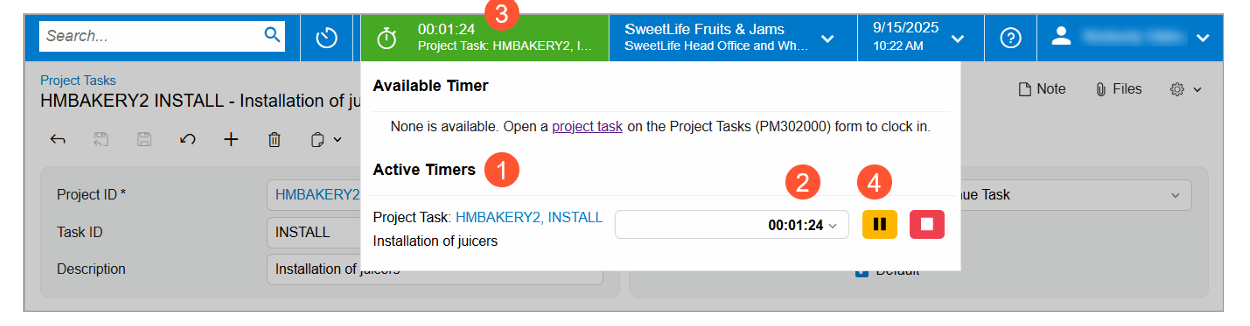
Taking a Break or Switching Tasks
Click Pause to take a break. The timer area changes color to indicate time tracking is paused. When you’re ready, click Resume to start again.
Working on multiple tasks? You can easily manage multiple timers. Pause one and start another, or switch between tasks directly from the timer panel. Each task’s time is tracked and logged separately.
Clocking Out
At the end of a task—or your day—simply click Stop. Acumatica stops the timer and automatically creates a time log for that session. No manual calculations or entries required.
With Acumatica 2025 R2, tracking time isn’t just faster—it’s smarter. This feature helps:
• Eliminate manual errors and lost billable time
• Improve project cost tracking and billing accuracy
• Give employees a simple, intuitive way to log their hours
Whether you’re managing construction crews, service teams, or project-based staff, Acumatica’s Clock In/Out feature brings efficiency and transparency to your time and expense processes.
Ready to see how Acumatica can simplify your daily workflows? Contact Polaris Business Solutions to schedule a personalized demo and explore Acumatica 2025 R2 in action.